DIY Flower Gift Bucket For Mom

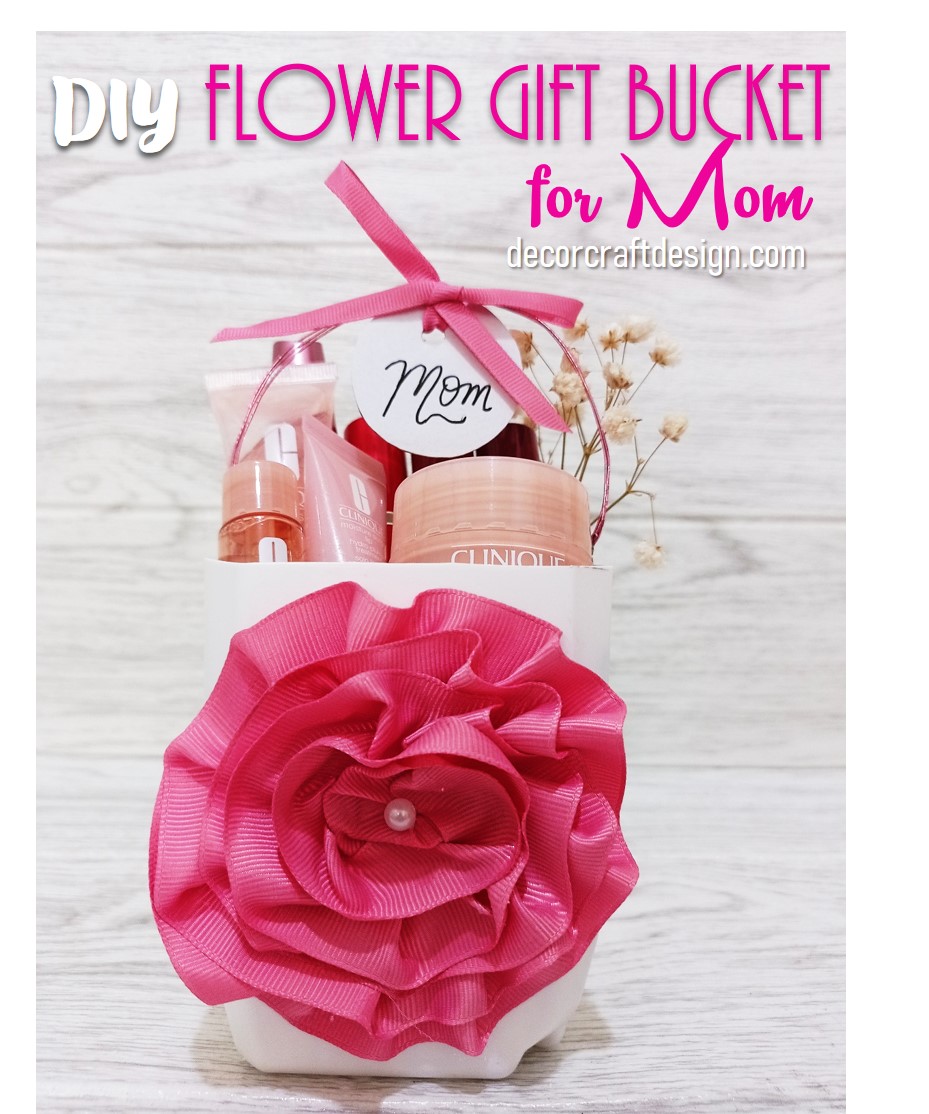
Mother’s Day is just a few weeks to come. This year I’ve prepared a face skin pampering gift in a stylish Flower Gift Bucket for my mom. My mom loves flowers, that’s why every Mother’s Day gift for her has to have some flowers in any form in it. And now is this stylish gift bucket that has a big element of ribbon flower. Once you made one, I’m sure you will addicted to make more. It’s easy and quick to make, perfect for mini gift basket and mini souvenir bucket as well.

Things To Prepare

Easy and short list of craft supplies to be prepared for this Mother’s Day gift bucket. Try to replace it with something similar to my material if you don’t have the same one. Just use whatever you have in your craft stash. Let’s see what are the list of supplies for this DIY Flower Gift Bucket For Mom :

  • Plastic bottle (you can replace it with plastic jar or any other plastic holder you can recycle)
  • Pink ribbon
  • a faux pearl
  • Clear glue
  • Pink colored wire
  • Used white paper card ( I got it from toy’s box )
  • Black acrylic marker

How To Make

It’s super easy to make, but the result is a fancy stylish looking gift bucket that will paint a happy smile on your mom’s lovely face. Anyway, follow these easy steps on how to do DIY Flower Gift Bucket for Mom :

1 . Make sure your plastic container (bottle or jar) is clean. I’m lucky to have a white plastic bottle that I don’t need to paint. Cut the bottle in your desired height, it depends on the proportion as a whole bucket. My bottle is a square bottle with 2:3 ratio between the width and the height.

2. Now poke two holes, each on left and right for inserting the pink wire. Don’t forget to secure both ends by tilting the pink wire.

3. Let’s now work with the flower ribbon! Apply a little glue in the center of the front bucket. Start tilting pink ribbon from the center as the inner flower. Keep circulating from the back side of ribbon flower until the flower is as wide as the width of the bucket.

4. Add a little faux pearl in the middle of the pink flower.

5. Get a paper card and cut into a circle, punch a hole on top and write “Mom” by using black marker. Insert a smaller size of pink ribbon into the Mom-card and tie a bow to the bucket wire-holder.

6. Add in some fabric or shredded paper on the bottom of the flower gift bucket before you arrange the skin care and cosmetics inside. Also add a little piece of baby’s breath at the bucket’s corner. Super stylish and fancy!

Easy and beautiful stylish flower gift bucket for your mom. I’m sure the gift and the look of the floral bucket will make your mom happy on Mother’s Day.

This DIY Flower Gift Bucket For Mom project is my contribution to The Sustainable Craft Challenge Blog Hop hosted by Julie with her beautiful blog Sum of Their Stories. It’s a craft challenge with a sustainable principle behind it which comes in different theme every month. This month, the theme is “Flower” and the last four months were “SPRING” “SOFT” “LOVE” and “WARM“. I love to be part of this challenge as I love to upcycle things into something new, beautiful and useful.

Now, let’s see what other blogger’s projects!

Sum of their StoriesRecycled Mini Collage with Crochet Flower
Purple Hues and MeIroned Pressed Flowers Glass Vessel
Christine’s CraftsGorgeous Book Page Roses – Surprisingly Easy to Make
Decor Craft DesignDIY Flower Gift Bucket For Mom
Southern SunflowersHow to Update a Thrift Store Find with Paper Flowers
Treasures Made From YarnFlora the Reversible Doll
Mimi A Great Name for GrandmaMason Lid Fabric Flowers
Life as a LEO WifeFloral Wood Letters with Free Rolled Flower Cut Files

For more of my future Spring and Mother’s Day posts, please follow me! And if you wanted to add my creations to your Pinterest boards, please follow me on Pinterest! Also find me on Instagram and Twitter!

For creative fellow bloggers, don’t forget to join You’re The Star” Blog Hop, Happiness Is Homemade Link Party and Home Matters Linky! Link your inspiring posts (anything, from recipes, home decor, DIYs, crafts, family, health to gardening) every Monday and Sunday. Get a change to be featured! I’m one of the co-host of You’re The Star blog hop for Creative Week and Happiness Is Homemade; I will choose the creative posts to be featured on Creative Features week and on Happiness Is Homemade. Please come and join the party!
Advertisement

DIY SPRING Letters Decoration

These are all Pringles can projects I’ve made before that I added some letters to make into the word SPRING. It’s a great way to upcycle your Pringles cans, big or small. Not just as decorations, but as many different functional things as well. So, after used as a set of decoration, you can use each can according to its function and still look beautiful.

Things To Prepare

It’s a common list of craft supplies that you need to prepare for this Spring project. Try to replace it with something similar to my material if you don’t have the same one. Just use whatever you have in your craft stash. Let’s see what are the list supplies which used to make this DIY SPRING Letters Decoration :

  • Pringles Can (big and small sizes)
  • Decorative paper (flowery pattern to represent Spring)
  • Ribbons
  • Double Foam Tape
  • Clear glue
  • Flower ribbon decoration
  • Egg (real or plastic will do)
  • Acrylic Markers
  • etc.

How To Make

Empty chips can is easy to work with and very useful. You can be creative with it as much as you can. Anyway, follow these easy steps on how to do DIY SPRING Letters Decoration :

1 . Make sure your Pringles can is clean. Wrap it with a flowery decorative paper of your choice.

2. Decorate it with different kind of style for each wrapped can. How you decorate it also depends on what function are you going to give to each can.

5. Make or buy decorated letters to form the word SPRING. If you notice, I use Eiffel Tower as a letter “I” for the top tower as the bottom part doesn’t appeared as a whole, so instead of an “A” I interpret it as “I”. I’m sure you’re dying to debate on it, SPRANG! Lol!

To find out in details on how to make and supplies needed for each decorated can, you can check out each of my projects below.

DIY Spring 3D Gift Can

DIY Spring Vase from Pringles Can


DIY Valentine’s Gift Pink Container With Initial

DIY Love Container For Valentine


How To Make Easy Valentine’s Treats Decoration

DIY Upcycled Container with Initial for Spring

Easy and fun to do Spring project. It’s not just plain decorations, but the upcycled Pringles cans are functional as well. Some serve as a hidden container, some as vases, some are multy-purpose holders. And it looks Springy!

For more of my future Spring and Mother’s Day posts, please follow me! And if you wanted to add my creations to your Pinterest boards, please follow me on Pinterest! Also find me on Instagram and Twitter!

For creative fellow bloggers, don’t forget to join You’re The Star” Blog Hop, Happiness Is Homemade Link Party and Home Matters Linky! Link your inspiring posts (anything, from recipes, home decor, DIYs, crafts, family, health to gardening) every Monday and Sunday. Get a change to be featured! I’m one of the co-host of You’re The Star blog hop for Creative Week and Happiness Is Homemade; I will choose the creative posts to be featured on Creative Features week and on Happiness Is Homemade. Please come and join the party!
DIY Spring 3D Gift Can

I don’t know why, but I keep recycling my empty Pringles cans. I couldn’t help it. I can be creative with it, it’s like a blank canvas to paint with. And it’s a great container to store anything you want. You can use it as a pencil holders, brush holder, vase, gift can/box, multi-purpose container, especially to store small things.

Empty chips can is easy to work with and very useful. And this time I made a Spring 3D Gift Can. It’s a Pringles can made into a gift can with a look of Spring and Easter, plus some 3d effects. Trust me, it’s a fun upcycling project that you can be creative with.

Things To Prepare

It’s a common list of craft supplies that you need to prepare for this Easter or Spring gift can. Try to replace it with something similar to my material if you don’t have the same one. Just use whatever you have in your craft stash. Let’s see what are the list supplies which used to make this DIY Spring 3D Gift Can :

  • Pringles Can
  • Decorative paper (flowery pattern) Try to find the single-flowers pattern which have easy shape for cutting.
  • Dark green ribbon
  • Light green ribbon
  • Baby pink ribbon
  • Double Foam Tape
  • Clear glue
  • Egg (real or plastic will do)
  • Acrylic Markers

How To Make

It’s actually easy to make, but you need to be very careful when you have to do the cutting parts; unless you are handy with a scissors, then it won’t be a problem at all, easy peasy! Anyway, follow these easy steps on how to do DIY Spring 3D Gift Can :

1 . Make sure your Pringles can is clean. Wrap it with the flowery decorative paper of your choice.

2. Now cut out as many as you can all the single-flowers from the decorative paper.

3. Paste each single flower on its match by using double foam tape for a 3D look.

4. Now, let’s work with the can’s cover! Arrange dark green ribbon together with light green ribbon to form a flowery bow. Secure it with clear glue! Don’t forget to paste a baby pink ribbon around the can’s lid.

5. Get an egg and start to draw a flower that similar to the flower on the decorative paper by using acrylic markers.

6. Then, glue the decorated egg on top of the lid. Well, that’s it, you’re done!

Easy and fun to do Spring project. You can use it as a gift container or use it by yourself to store your small craft supplies. I love the 3D look from the flowers, it gives a different look than an usual decorative paper

This DIY Spring 3D Gift Can project is my contribution to The Sustainable Craft Challenge Blog Hop hosted by Julie with her beautiful blog Sum of Their Stories. It’s a craft challenge with a sustainable principle behind it which comes in different theme every month. This month, the theme is “SPRING” and the last three months were “SOFT” “LOVE” and “WARM“. I love to be part of this challenge as I love to upcycle things into something new, beautiful and useful.

Now, let’s see what other blogger’s projects!

Sum of their StoriesTulip Collage Greeting Cards
Purple Hues and MeEverlasting Spring Blossoms DIY
Christine’s CraftsHow to Easily and Quickly Fold a Cute 3D Origami Tulip
Decor Craft DesignDIY Spring 3D Gift Can
SongbirdNatural Spring Decor
Life as a LEO WifeFarmhouse Style Framed Bunny & Easter Egg

For more of my future Spring and Easter posts, please follow me! And if you wanted to add my creations to your Pinterest boards, please follow me on Pinterest! Also find me on Instagram and Twitter!

For creative fellow bloggers, don’t forget to join You’re The Star” Blog Hop, Happiness Is Homemade Link Party and Home Matters Linky! Link your inspiring posts (anything, from recipes, home decor, DIYs, crafts, family, health to gardening) every Monday and Sunday. Get a change to be featured! I’m one of the co-host of You’re The Star blog hop for Creative Week and Happiness Is Homemade; I will choose the creative posts to be featured on Creative Features week and on Happiness Is Homemade. Please come and join the party!

Upcycled Bottle Vases With Soft Spring Colors

For this coming Spring, I have an idea to make a quick or last-minutes Spring decoration. It’s an Upcycled Bottle Vases With Soft Spring Colors. It’s easy to make and one of the great way to upcycle your glass bottles from wine bottles, sauce bottles, seasoning bottles or any other glass bottles you have. The idea is super simple, as simple as the materials and as simple as the making. You can see how easy are the steps to make these soft looking vases to welcome your Spring. Let’s start with the supplies that I used to make these bottle vases with soft Spring colors.

Things To Prepare

It’s a short list of supplies that you need to prepare. Try to replace it with something similar to my material if you don’t have the same one. Just use whatever you have in your craft stash. Let’s see what are the list supplies which used to make this Upcycled Bottle Vases With Soft Spring Colors :

  • Two different shapes and sizes of glass bottles (used-bottles)
  • White Spray Paint
  • Light green ribbon (1/8 inch)
  • Baby pink ribbon (1/8 inch)
  • Clear glue

How To Make

I chose a very simple way to make these soft colors bottle vases, instead of twice spraying technique which I’ve done my gold bottle vase before; this time I used ribbon as the Spring soft colors against white painted bottles. Anyway, just follow these easy steps on how to do Upcycled Bottle Vases With Soft Spring Colors :

1 . Make sure your glass bottles are cleaned. Spray paint the bottles with white paint. Let it sit until it’s dry.

2. Cut baby pink ribbon and glue it around the bottom part of one of the bottle. Then, followed by light green ribbon for the other bottle. Don’t make too many ribbon winding, let it has the contrast between the pale white of the bottles and the ribbon’s colors.

3. Last touch is to insert some Baby’s Breath into the Spring bottles vases. Super lovely! It looks soft and pure.

I used baby pink and light green as my color choices for soft Spring colors with a pure neutral white. I think it’s a great look for decoration on Winter to Spring transition. But it looks perfect for Spring as well.

This Upcycled Bottle Vases With Soft Spring Colors project is my contribution to The Sustainable Craft Challenge Blog Hop hosted by Julie with her beautiful blog Sum of Their Stories. It’s a craft challenge with a sustainable principle behind it which comes in different theme every month. This month, the theme is “SOFT” and last two months were “LOVE” and “WARM“. I love to be part of this challenge as I love to upcycle things into something new, beautiful and useful.

Now, let’s see what other blogger’s projects!

Sum of their StoriesUpcycled Sweater Easter Gift Bags
Purple Hues and MeLoopy Yarn Lamb Treat Jar
Christine’s CraftsDIY Hair Towel Wrap
Mimi – A Great Name for GrandmaDIY Sock Bunnies
Stone Cottage AdventuresDIY Cozy Weighted Warmer
Southern SunflowersNo Sew Drop Cloth Bunny Pillow
Sew Crafty CrochetCrochet Tabby Cat
Treasures Made From YarnStash Buster Blanket
Decor Craft DesignUpcycled Bottle Vases With Soft Spring Colors
Life as a LEO WifeFarmhouse Chunky Yarn Wreaths for Spring

For more of my future Spring and Saint Patrick’s Day posts, please follow me! And if you wanted to add my creations to your Pinterest boards, please follow me on Pinterest! Also find me on Instagram and Twitter!

For creative fellow bloggers, don’t forget to join You’re The Star” Blog Hop, Happiness Is Homemade Link Party and Home Matters Linky! Link your inspiring posts (anything, from recipes, home decor, DIYs, crafts, family, health to gardening) every Monday and Sunday. Get a change to be featured! I’m one of the co-host of You’re The Star blog hop for Creative Week and Happiness Is Homemade; I will choose the creative posts to be featured on Creative Features week and on Happiness Is Homemade. Please come and join the party!

DIY Lucky Shamrock Sign Paper Craft

You may look for some easy-to-make Saint Patrick’s Day craft to do with your kids. The one that cute enough to be used as your lucky shamrock decoration. Well, I have this idea that you may like to try; A DIY Lucky Shamrock Sign Paper Craft. It’s easy to make with easy material to find and cute result! Scroll down as you can find steps I did to make this Saint Patrick’s decoration from paper base materials.

Things To Prepare

If you have some stacks of colorful paper straws, then you’re lucky! You can straight away and do this lucky shamrock paper craft. You can play with pattern and even the color of the paper straws, as long as it looks like pretty rainbow. Just use whatever you have in your craft stash. Let’s see what are the list supplies which used to make this DIY Lucky Shamrock Sign Paper Craft :

  • Used – thick paper (mine is paper from a table calendar)
  • White card paper
  • Green crepe paper
  • Colorful rainbow paper straws
  • Gold ribbon
  • Double Foam Tape
  • Clear glue

How To Make

This paper craft is easy to do and cute for the Saint Patrick’s Day decoration. Follow these easy steps on how to do DIY Lucky Shamrock Sign Paper Craft :

1 . I recycle a calendar paper and cut it as a base for the shamrock sign. I cut it in a length of 24 paper straws times half length of a straw plus a little mountain as a base to the shamrocks.

2. Cut all straws into two. I used 8 colors of straws; pink, red, dark blue, light blue, green, yellow, orange and purple. I used 3 cut-straws on each color. So, the total is 24 straws (half straw), from 8 different colors. Glue one by one. Try to arrange pop-out color to less pop-out color, side by side.

3. Now, cut a rectangle shape along the mountain to raise the shamrock by pasting a foam tape. But before, cut green crepe paper in lucky shamrock shape.

4. Then you paste it one by one until it looks lush and pretty.

5. Make letters L, u, c, k, y by using a white card paper. Paste it one the middle of the rainbow straws by using foam tape.

6. Add some blings to add some shines by appling gold ribbon as a hanger and on the front rainbow straws. Don’t forget to add a little gold ribbon bow in the middle. Cute!

Easy paper craft to do with your kids for the Saint Patrick’s decoration. Cheap and easy to find material, just perfect for simple lucky shamrock craft. The lucky shamrock, the rainbow straws and the gold ribbon are complete elements for the Saint Patrick’s Day. Happy crafting!

For more of my future Winter posts, please follow me! And if you wanted to add my creations to your Pinterest boards, please follow me on Pinterest! Also find me on Instagram and Twitter!

For creative fellow bloggers, don’t forget to join You’re The Star” Blog Hop, Happiness Is Homemade Link Party and Home Matters Linky! Link your inspiring posts (anything, from recipes, home decor, DIYs, crafts, family, health to gardening) every Monday and Sunday. Get a change to be featured! I’m one of the co-host of You’re The Star blog hop for Creative Week and Happiness Is Homemade; I will choose the creative posts to be featured on Creative Features week and on Happiness Is Homemade. Please come and join the blog hop and I

DIY Love Container For Valentine

Valentine’s Day is near, you may want to give some sweats to your loved ones, but you need a special appearance for the sweets to impress your loved ones. A handmade container will impress more than a store bought. It will not cost you a lot as my idea is recycling some used things; in this case I used Pringles can and a decorative tissue paper which I get from a party that is still clean. It’s a cute way to show your love, especially those who love saving environment. Scroll down to see how I made this Love Container for Valentine’s Day.

Things To Prepare

It’s a short list of supplies that you need to prepare. Try to replace it with something similar to my material if you don’t have the same one. Just use whatever you have in your craft stash. Let’s see what are the list supplies which used to make this DIY Love Container for Valentine :

  • Pringles can
  • Decorative tissue paper
  • Decorative paper
  • Pink jute rope
  • Rose ribbon ornaments
  • Paper glue
  • Clear glue

How To Make

To show how much we love our loved ones, . Anyway, just follow these easy steps on how to do DIY Love Container for Valentine :

1 . Make sure your Pringles can is cleaned. Wrap your Pringles can with a decorative paper. I used vertical lines with shades of pink decorative paper.

2. Cut a tissue paper on the picture that you like to use. Mine is a drawing of a Eiffel Tower in France with roses and macarons. I love it, it’s vintage and romantic.

3. Now paste the cut-tissue paper carefully to the wrapped-Pringles can. Use paper glue.

4. Then you can decorate the lid. Take some rose ribbon ornaments and paste it one by one around the Pringles lid. It goes well with the tissue paper pattern of roses.

5. Last touch is to draw or apply some glue to the side of the picture of Eiffel Tower a shape of heart. Use the pink jute rope to to make the heart. Isn’t it pretty?

I think it’s pretty enough to hold your yummy sweets and use it as a Valentine’s gift to your loved ones. A handmade gift plus sweets? That’s surely showers of love! By the way, it’s easy to make, right?

This Love Container project is my contribution to The Sustainable Craft Challenge Blog Hop hosted by Julie with her beautiful blog Sum of Their Stories. It’s a craft challenge with a sustainable principle behind it which comes in different theme every month. This month, the theme is “LOVE” and last month was “WARM“. I love to be part of this challenge as I love to upcycle things into something new, pretty and useful.

Now, let’s see what other blogger’s projects!

Sum of their StoriesUpcycle a Plastic Container with Paint Pens
Our Good LifeWine Cork Phone Holder
Sew Crafty CrochetValentine’s Day Gnome Scarf
Decor Craft DesignDIY Love Container For Valentine
Treasures Made From YarnHeart Garland
Vicky Myers CreationsHow to make a cute paper heart garland
Purple Hues and MeWire Hanger Soda Can Heart Wreath
Life as a LEO WifeWinter Door Hanger without a Cricut
A Rose Tinted WorldDIY Heart Garland from Upcycled Cards
Christine’s CraftsEasy Valentine’s cards using paper scraps.
SongbirdDIY Lace Valentine’s Hearts
Mimi – A Great Name for GrandmaDIY Valentine Branch Tree
Southern SunflowersHow to Decorate a Tin Can Planter

For more of my future Winter and Valentine’s posts, please follow me! And if you wanted to add my creations to your Pinterest boards, please follow me on Pinterest! Also find me on Instagram and Twitter!

For creative fellow bloggers, don’t forget to join You’re The Star” Blog Hop, Happiness Is Homemade Link Party and Home Matters Linky! Link your inspiring posts (anything, from recipes, home decor, DIYs, crafts, family, health to gardening) every Monday and Sunday. Get a change to be featured! I’m one of the co-host of You’re The Star blog hop for Creative Week and Happiness Is Homemade; I will choose the creative posts to be featured on Creative Features week and on Happiness Is Homemade. Please come and join the blog hop and I

How To Make Easy Valentine’s Treats Decoration

Do you celebrate Valentine’s Day? You want to have a simple celebration but enough to bring up the Love vibes? Then my Easy Valentine’s Treat Decoration will help you prepare one of the elements for Valentine’s Day. Have a cute simple treats on Valentine’s Day is forgiven, pink shades are not tacky, so combine these two things, then you’ve got yourself a valentine’s treats which able to decorate your Valentine’s Day simple celebration.

I made a very easy Valentine’s Treats Decoration from a cute Valentine’s container which made out of a Pringles can and some pink and blue marshmallows. I think marshmallows are perfect for Valentine’s Day treats beside chocolates and candies. Marshmallows are sweet, soft, yummy, come in many soft pretty colors and usually looks adorable even in just a regular marshmallow form. Don’t you agree?

Things To Prepare

Like always, I use things that I can find on my craft supplies and always try to repurpose or recycling things. I don’t intentionally buy new supplies unless it’s an essential part of my project that I don’t have. Let’s see what are the list supplies which were used to make this Easy Valentine’s Day Treats Decoration :

  • Small Pringles can
  • Decorative paper wrap (mine is with heart pattern)
  • Pink ribbon
  • Clear glue and paper glue
  • Pink paper straw
  • Marshmallows in white and pink

How To Make

An adorable Valentine’s container with marshmallows is super easy to make and serve. The Valentine’s treats can be a decoration element as well. Anyway, just follow these easy steps on how to make Easy Valentine’s Treats Decoration :

1 . Prepare a small Pringles can or any other similar can. Make sure it’s cleaned.

2. Cut the decorative paper wrapper to the size of the can and then glue it to wrap the Pringles can.

3. Next is to paste a small pink ribbon around the top and bottom of the Pringles holder with clear glue. Your Valentine’s Treats holder is done!

4. Now, take some pink and white marshmallow and thrust it one by one to each pink straw.

5. Lastly, arrange all of those pink and white marshmallows on straw in the Valentine’s holder. Super cute for Valentine’s treats decoration isn’t it?

This easy Valentine’s Treats is great for Valentine’s Day decoration. It can be one of a great Valentine’s treats decoration on the Valentine’s treat station in your home. Mixed it with other treats or maybe even make more of this Valentine’s treats and put it along your Valentine’s tablescape as a center piece. Be creative with it.

For more of my future Winter and Valentine’s Day posts, please follow me! And if you wanted to add my creations to your Pinterest boards, please follow me on Pinterest! Also find me on Instagram and Twitter!

For creative fellow bloggers, don’t forget to join You’re The Star” Blog Hop, Happiness Is Homemade Link Party and Home Matters Linky! Link your inspiring posts (anything, from recipes, home decor, DIYs, crafts, family, health to gardening) every Monday and Sunday. Get a change to be featured! I’m one of the co-host of You’re The Star blog hop for Creative Week and Happiness Is Homemade; I will choose the creative posts to be featured on Creative Features week and on Happiness Is Homemade. Please come and join the blog hop and I would love to see you there! Please join and share the news!

Easy Valentine’s Card With One Colored Pencil

Giving a handmade Valentine’s card for your loved ones will leave a special meaning. You can craft a Valentine’s card or draw your Valentine’s card. This time I’m going to share an idea of an Easy Valentine’s Card With One Colored Pencil. Yes, You will only need to use a pink colored pencil to draw your own Valentine’s card. It’s easy and quick to do, and of course it looks super sweet for Valentine’s Day. Let me show you how I draw my Valentine’s card step by step.

Things To Prepare

Super short list of supplies for this Valentine’s card, and your main tool is your hand. Let’s see what are the list supplies which were used to make this Easy Valentine’s Card With One Colored Pencil :

  • A drawing paper (I used B5 paper size)
  • Pink colored pencil
  • Black drawing pen

How To Make

To show how much I love my loved ones, I drew lots of hearts. It’s easy and will take less than an hour to draw even for those who doesn’t used to draw. Anyway, just follow these easy steps on how to draw an Easy Valentine’s Card With One Colored Pencil :

1 . Fold your drawing paper into two, neatly.

2. Now, draw a frame with one line by using pink colored pencil. It doesn’t have to be very straight lines, it can be a little bit shaky lines.

3. Next is to draw many hearts in a different sizes and orientation. Some are big, small, medium, or tiny. Some are facing left, some are to the right and some just straight. I was starting with drawing a big hearts first then follow by smaller and smaller hearts.

4. It’s time to color it. Start to color some hearts in darkest pink. Press your pink colored pencil while coloring to get a darker pink. Try to scatter the colored hearts.

5. Repeat it to some other hearts, but this time, loose your pressure to the colored pencil to have a lighter color than before.

6. Do it again with even lighter pink, so you will get 3 shades of pink; dark pink, medium pink and light pink.

7. Your hearts coloring is finished, so now take your black drawing pen and write “/lav/” which is how to pronounce “love”. And on the inside, write down “That’s how you say it”. Finished!

I think is super cute and you can make more of this Valentine’s card easily. You can change the pink color with other favorite color of your loved ones, like maybe red, purple or even blue. Well, but if you want to stick to the traditional Valentine’s color, then use a pink colored pencil.

For more of my future Winter and Valentine’s Day posts, please follow me! And if you wanted to add my creations to your Pinterest boards, please follow me on Pinterest! Also find me on Instagram and Twitter!

For creative fellow bloggers, don’t forget to join You’re The Star” Blog Hop, Happiness Is Homemade Link Party and Home Matters Linky! Link your inspiring posts (anything, from recipes, home decor, DIYs, crafts, family, health to gardening) every Monday and Sunday. Get a change to be featured! I’m one of the co-host of You’re The Star blog hop for Creative Week and Happiness Is Homemade; I will choose the creative posts to be featured on Creative Features week and on Happiness Is Homemade. Please come and join the blog hop and I would love to see you there! Please join and share the news!

DIY Valentine’s Gift Pink Container With Initial

Valentine’s Day is a month to come, it’s time to think about our loved ones. A loving thought that is best being expressed in a tangible thing, a Valentine’s Day Gift! Yes, and I have an idea for a little cute gift for Valentine; A DIY Valentine’s Gift Pink Container With Initial. This glittery pink container is great for Valentine’s Day gift. You can fill it with sweets, cute hair clips, some mini cosmetics, anything! And of course the initial is the initial of your loved one’s name. More great news is that the Valentine’s container is super easy to make. Let see my tutorial!

Things To Prepare

Like always, I use things that I can find on my craft supplies. I don’t intentionally buy new supplies unless it’s an essential part of my project that I don’t have. Let’s see what are the list supplies which were used to make this DIY Valentine’s Gift Pink Container With Initial :

  • Small Pringles can
  • Pink pattern paper wrap (mine is with Robin and flowers pattern)
  • Pink glitter craft foam
  • Pink ribbon
  • A white drawer knob plus a screw
  • Clear glue and paper glue

How To Make

To show how much we love our loved ones, an adorable pink glittery container with sweets or any cute mini gifts will definitely showers them with love. Anyway, just follow these easy steps on how to do DIY Valentine’s Gift Pink Container With Initial :

1 . Prepare a small Pringles can or any other similar can that you have with a lid. Make sure it’s cleaned. Unless you want to give a Pringles as a gift, then you can skip the cleaning part.

2. Cut the paper wrapper to the size of the can and then glue it to wrap the Pringles can. I chose the part where the paper has a Robin bird on it.

3. Next is to cut a pink glitter craft foam to cover the lid and cut out an initial. Be careful with the initial, don’t draw it on the wrong direction.

4. Now, after you paste the glitter pink circle and an initial to the wrapped can, it’s time for you to install a cute knob on the lid. Use a small screw to secure it.

5. Lastly, get some pink ribbon and wrap around the side of the lid. It’s a great finish for the lid to look better. Finished!

It’s your choice to send a can of Pringles with my decoration idea or use this empty decorated Pringles can as a container to your other mini gifts or sweets for Valentine’s Day. Whichever makes your loved ones happy, that one will surely the best to choose. Above all, this cute valentine’s gift container will steel any girl’s heart.

For more of my future Winter and Valentine’s Day posts, please follow me! And if you wanted to add my creations to your Pinterest boards, please follow me on Pinterest! Also find me on Instagram and Twitter!

For creative fellow bloggers, don’t forget to join You’re The Star” Blog Hop, Happiness Is Homemade Link Party and Home Matters Linky! Link your inspiring posts (anything, from recipes, home decor, DIYs, crafts, family, health to gardening) every Monday and Sunday. Get a change to be featured! I’m one of the co-host of You’re The Star blog hop for Creative Week and Happiness Is Homemade; I will choose the creative posts to be featured on Creative Features week and on Happiness Is Homemade. Please come and join the blog hop and I would love to see you there! Please join and share the news!

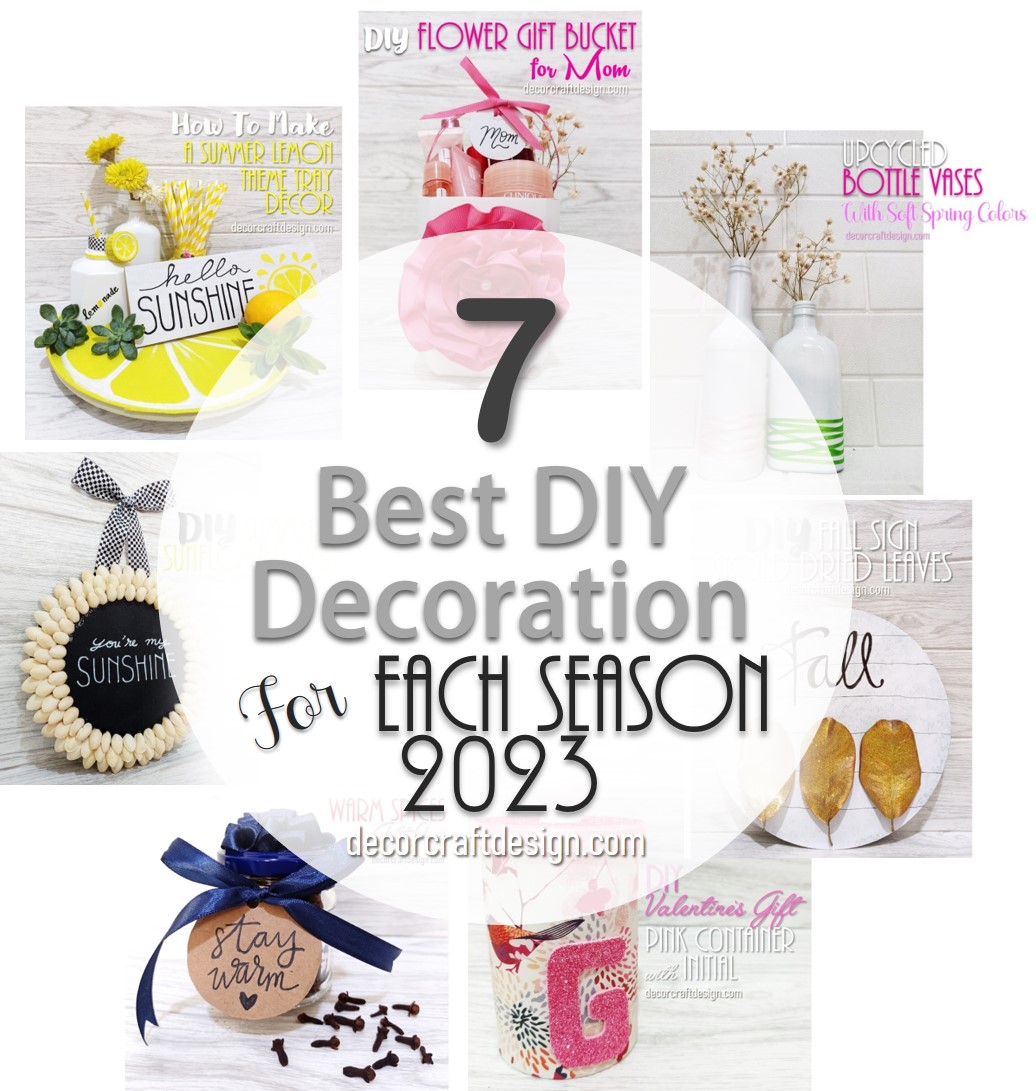
6 Best Upcycling Projects of 2022

Year 2022 has past and now is 2023, how fast the time is. Although I love to do a lot of things like to do decor, designing, painting, sketching, crafting; I seemed to be doing a lot of upcycling project last year, which also my hobby. I just love to see potentials from a thing that usually end up in a garbage bin. It’s a pleasure to see an old or broken thing got its new life, new purpose and new great look. That is why I round up 6 Best Upcycling Projects of 2022. I hope you enjoy every of my upcycling project.

So, let start one by on my upcycling projects of 2022, they’re not in particular order. You can visit each project to find out how I made each of my upcycling project, just click on the project’s title.

DIY Painted Upcycled Mug

DIY Spring Wreath – Upcyling Rattan Basket

Upcycled Towel Basket for Summer Decor

DIY Tiered Tray Upcycled Cookie Tins

DIY Pinecone for Fall

DIY Vases with a Zero Waste Plastic Bottle

For more of my future Winter posts, please follow me! And if you wanted to add my creations to your Pinterest boards, please follow me on Pinterest! Also find me on Instagram and Twitter!

For creative fellow bloggers, don’t forget to join You’re The Star” Blog Hop, Happiness Is Homemade Link Party and Home Matters Linky! Link your inspiring posts (anything, from recipes, home decor, DIYs, crafts, family, health to gardening) every Monday and Sunday. Get a change to be featured! I’m one of the co-host of You’re The Star blog hop for Creative Week and Happiness Is Homemade; I will choose the creative posts to be featured on Creative Features week and on Happiness Is Homemade. Please come and join the blog hop and I would love to see you there! Please join and share the news!

DIY Warm Spices Gift Jar

Happy New Year everyone! Very excited for this New year, I hope everything will be better this year; peace, good health and joy everywhere! One of the greatest act to spread some joy is to give gifts to your loved ones. In this cold winter, I have an idea of DIY Warm Spices Gift jar to help your loved ones to stay warm on this winter. Gather some warm spices and put it in a beautiful handmade jar as gift, that would make anyone who receive it happy. Now, let me share how to make this warm spices gift jar, step by step.

Before I continue, I actually were asked again by Julie with her beautiful blog Sum of Their Stories to join again this year for a sustainable challenge like we did last year, but this time the name is The Sustainable Craft Challenge Blog Hop, not a Pinterest Challenge anymore. It’s a craft challenge with a sustainable principle behind it which comes in different theme every month. This month, the theme is “Warm”. I love to be part of this challenge as I love to upcycle things into something pretty and useful.

Things To Prepare

Some spices which great to warm up your body are the main ingredients. Have it in a handmade decorated used-jar is the wow effect. I promise you, you won’t get any trouble to find the materials for this warm spices gift jar Let’s see what are the list supplies which used to make this DIY Warm Spices Gift Jar :

  • Cinnamon
  • Cloves
  • Nutmeg
  • Star Anise
  • A small glass jar with the lid
  • Dark blue ribbon
  • Cardboard
  • Clear glue

How To Make

To show how much we love our loved ones, a warm gift such this warm spices gift jar is surely a great idea. Easy to make with quick preparation but super adorable in dark blue that scream for winter. Anyway, just follow these easy steps on how to do DIY Warm Spices Gift Jar :

1 . Prepare a small glass jar ( I used a cheese spread jar) with a dark blue lid (paint it if you don’t have it) and four warm spices (you can add more or switch some). I used cinnamons, star anises , nutmegs and cloves. I chose these four spices because of it’s different shapes and sizes, also the amazing fragrance from them. Star anise is so pretty, cinnamon smells heaven, nutmeg is cute with it’s bulky look and cloves are tiny and have a complex shape. And they are all warm spices.

2. Cut a circle from a cardboard and punch a hole on it.

3. Get your dark blue ribbon and glue it to the jar’s lid in away that the center are taller then the rest. It will form such a beautiful flowery look to the lid. Use glue to secure it.

4. Now organize the four warm spices into the jar by carefully place them one by one. I started with the cinnamon, then the cloves, followed by nutmegs and star anise as the final touch. Then close the jar with the flowery lid.

5. To wrap it up, write “Stay Warm” on the cardboard tag and insert blue ribbon to it. Tie it to the spices jar and ended with a nice bow. Done!

I think it’s a lovely gift to send your loved ones, warm spices in a beautiful handmade gift jar. The blue present a winter look but the spices will keep you warm. Hope you are inspired to make some for your loved ones in this beginning of year 2023.

Now, let’s see what other blogger’s projects!

Sum of their StoriesSwiss Darn Stained Sweater Makeover
Our Good LifeHomemade Swiss Mocha Hot Drink with Reusable Container
Sew Crafty CrochetThe Wednesday [Inspired] Snood
Vicky Myers CreationsSuper cozy fleece hot water bottle carrier, Free pattern
Mimi BlogDIY Snowy Luminary
Decor Craft DesignDIY Warm Spices Gift Jar
Treasures Made From YarnCozy Neck Cowl
Purple Hues and MeRecycled NoSew Pillow Teapot Cozy
Life as a LEO WifeWinter Door Hanger without a Cricut
SongbirdHow to make a cozy winter blanket (the easy way)

For more of my future Winter posts, please follow me! And if you wanted to add my creations to your Pinterest boards, please follow me on Pinterest! Also find me on Instagram and Twitter!

For creative fellow bloggers, don’t forget to join You’re The Star” Blog Hop, Happiness Is Homemade Link Party and Home Matters Linky! Link your inspiring posts (anything, from recipes, home decor, DIYs, crafts, family, health to gardening) every Monday and Sunday. Get a change to be featured! I’m one of the co-host of You’re The Star blog hop for Creative Week and Happiness Is Homemade; I will choose the creative posts to be featured on Creative Features week and on Happiness Is Homemade. Please come and join the blog hop and I would love to see you there! Please join and share the news!

DIY New Year Photo Booth in Gold and Silver

New Year is coming! Do you excited for New Year? I guess some of you have planned a festive New Year’s eve party with family and friends for this upcoming year of 2023. Well if that so, I have a perfect idea to record your 2023 New Year celebration in more fun and memorable way. I’ve made a DIY New Year Photo Booth in gold and silver look. It’s easy and affordable to make but the look is super glamour in gold and silver. Let’s find out how I made it!

Things To Prepare

Super easy to make and easy-to-find supplies. It’s just great for fun and glamorous New Year party props. Let’s see what are the list supplies which used to make this DIY New Year Photo Booth in Silver and Gold :

  • Cardboard
  • Gold paper
  • Silver paper
  • Gold ribbon
  • Silver snowflake blings
  • Glue

How To Make

This is a very simple way to wrap a Christmas gift but the result is surely able to show how much our love. Anyway, just follow these easy steps on how to do DIY New Year Photo Booth in Gold and Silver :

1 . Cut a big cardboard into a frame, the size is depend on how big you wanted.

2. Wrap the cardboard frame with gold paper.

3 .Cut some gold and silver paper in a shape of rectangle. Fold each paper in zig zag. Then fold the middle to get a center dot and open the folded zig zag and turn it into a flower look.

4. When you enough silver and gold flower folded papers, attach them one by one to the gold frame. Arrange them like I did or as you like, but try to group them to look nice.

5. Continue to decorate the gold frame with gold ribbon. I tied around the frame with loose tie on the front and I secure it with glue at the back of the frame.

6. The last decoration for the gold frame photo booth is to spread some silver snowflakes on the frame. Glue it one by one until you’re happy with the look. Finished! You’ve got yourself a New Year Photo Booth in glamorous gold and silver!

This fancy gold and silver photo booth will look awesome for your New Year of 2023 party, especially with additional props that I’ve made from recent years. Check these out!

How To Make Wishing Wand for New Year

DIY New Year’s Eve Hat

How To Make Easy New Year’s Party Hat

DIY New Year’s Photo Booth Props

Super Quick and Easy DIY New Year’s Mini Sparkle Ball Ornaments

DIY Sparkling Bottle New Year Sign

DIY New Year Wishing Tree

and many more.

For more of my future Winter posts, please follow me! And if you wanted to add my creations to your Pinterest boards, please follow me on Pinterest! Also find me on Instagram and Twitter!

For creative fellow bloggers, don’t forget to join You’re The Star” Blog Hop, Happiness Is Homemade Link Party and Home Matters Linky! Link your inspiring posts (anything, from recipes, home decor, DIYs, crafts, family, health to gardening) every Monday and Sunday. Get a change to be featured! I’m one of the co-host of You’re The Star blog hop for Creative Week and Happiness Is Homemade; I will choose the creative posts to be featured on Creative Features week and on Happiness Is Homemade. Please come and join the blog hop and I would love to see you there! Please join and share the news!

Easy Christmas Gift Wrapping Ideas

Christmas is just a week away, I’m sure some of you have bought Christmas gifts for your loved ones. But, have you wrap them all? Yes, wrapping Christmas gifts can be a lot of work, especially when we want to impress our loved ones with our Christmas gifts. Don’t worry, my easy Christmas gift wrapping ideas may save your Christmas. Let’s find out more!

It’s an easy wrapping idea since it’s only involving several easy-to-find supplies and it’s easy to do. But the Christmas wrapped gifts are going to impress your loved ones with it’s elegant and fancy looks. I let the gold nuances do the wonder. The rest are just simple look.

Things To Prepare

Super easy to make and easy-to-find supplies. It’s just great for quick and practical Christmas gifts wrapping preparation. Let’s see what are the list supplies used to make this Easy Christmas Gifts Wrapping Ideas :

How To Make

This is a very simple way to wrap a Christmas gift but the result is surely able to show how much our love. Anyway, just follow these easy steps on how to do easy Christmas Gift Wrapping Ideas :

1 . Get kraft paper and cut accordingly to wrap each of your Christmas present.

2. Tie each wrapped- Christmas gift with a string of gold ribbon in the middle part of the gift.

3 .Insert a Christmas cake topper (or any ornament that you have with prefered gold nuance) to each Christmas gift. I inserted a Mini Christmas Wreath topper, a christmas star topper and a white Merry Christmas topper. And you’re done with your Christmas gifts wrapping work!

Super easy, it took me only three steps to wrap each of these beautiful Christmas gifts; Firstly, wrap it with kraft paper, secondly, tie it and make a bow out of a gold ribbon and lastly is to insert a Christmas cake topper into the gold ribbon. Simply beautiful, that’s how I like it!

For more of my future Christmas posts, please follow me! And if you wanted to add my creations to your Pinterest boards, please follow me on Pinterest! Also find me on Instagram and Twitter!

For creative fellow bloggers, don’t forget to join You’re The Star” Blog Hop, Happiness Is Homemade Link Party and Home Matters Linky! Link your inspiring posts (anything, from recipes, home decor, DIYs, crafts, family, health to gardening) every Monday and Sunday. Get a change to be featured! I’m one of the co-host of You’re The Star blog hop for Creative Week and Happiness Is Homemade; I will choose the creative posts to be featured on Creative Features week and on Happiness Is Homemade. Please come and join the blog hop and I would love to see you there! Please join and share the news!

DIY Christmas Star Decoration

Christmas is just a month away, I’m sure some of you have already planned or even shopped for Christmas decorations for your lovely home. Well, for those whom love to make their own Christmas decorations and having Christmas activity time with kids, my DIY Christmas Star Decoration is the best project to do together before Christmas.

I actually repurposed my old Christmas DIY Mini Wreath that I made years ago as a tree ornament. Now, I gave a new purpose for the mini wreath ornament into a bigger wreath.

Things To Prepare

Super easy to make and easy-to-find supplies. It’s just great for quick and practical Christmas decoration preparation. Let’s see what are the list supplies used to make this DIY Christmas Star Decoration from straws :

How To Make

This surely a super easy Christmas DIY which kids can easily help to make. Anyway, just follow these easy steps on how to make DIY Christmas Star Decoration :

1 . Prepare the mini Christmas wreath, you can buy or DIY like mine. Check out my tutorial on the Mini Christmas Wreath

2. Start with cutting each straw into 3, 4, 5, and 6 parts.

3 .Glue straws on the back of the mini wreath. Start from the red longest one to the shortest. Then continue with green straws.

4. Last touch up is to add a gold ribbon bow on the bottom of the mini wreath. Done!

Super cute and easy to make! You can bring along your kids to make more of this Christmas Star Decoration. You can hang them in front of a door or your kitchen cabinet’s doors. You can even use it as a wrapper ornament for a big Christmas present.

For more of my future Christmas posts, please follow me! And if you wanted to add my creations to your Pinterest boards, please follow me on Pinterest! Also find me on Instagram and Twitter!

For creative fellow bloggers, don’t forget to join You’re The Star” Blog Hop, Happiness Is Homemade Link Party and Home Matters Linky! Link your inspiring posts (anything, from recipes, home decor, DIYs, crafts, family, health to gardening) every Monday and Sunday. Get a change to be featured! I’m one of the co-host of You’re The Star blog hop for Creative Week and Happiness Is Homemade; I will choose the creative posts to be featured on Creative Features week and on Happiness Is Homemade. Please come and join the blog hop and I would love to see you there! Please join and share the news!

DIY Christmas Can Holder

This November Challenge Theme is Christmas! I love to upcycle things, give them a brand new life and turn them into something beautiful and useful. This time I get my idea from a Santa Cupcake. I was inspired to make a can holder that looks like Santa and also a Christmas tree. Now, the project is DIY Christmas Can Holder which recycling a Coke can. But before I move on, let me explain a bit about The Sustainable Pinterest Challenge.

The Pinterest Challenge has had a bit of a reboot for 2022 and is now the Sustainable Pinterest Challenge. Each month I join a group of creative bloggers and we select a pin or two that we feel inspired by and give it a go. Starting in January 2022 the Pinterest Challenge has a sustainable, eco friendly twist to it. All the projects shared will have something about them that involves recycling, upcycling, a general ethos of reducing waste and using what we have. It’s not about beating ourselves with a stick, it’s just about giving thought to how we can make small changes in our lives just a little more sustainable and reduce our impact on the environment.

Last month’s theme challenge was “Zero Waste” and I made an DIY Vases With a Zero Waste Plastic Bottle. For this month theme “Christmas” as sustainable as a base to any of our challenge projects, I used a Coca Cola can and a Coke plastic Bottle for a Christmas holder which looks fantastic as Christmas decoration plus a candy holder.

Things To Prepare

Super easy and quick to make and easy-to-find supplies, so this DIY Christmas Can Holder from a Coca Cola can is just great for upcycling project and cute for Christmas decorations. Let’s see what are the complete super short list supplies that are used to make this DIY Christmas Coca Cola Can Holder :

  • A coca cola can ( I used the slim can)
  • Plastic bottle of Coke (Large bottle)
  • White lace
  • Red ribbon
  • Black belt (mini size), you can also use black ribbon as the belt
  • Glue

How To Make

This surely a super easy recycling Christmas project, I’m sure. You can ask your kids to help and have fun doing it. Just follow these easy steps on how to make DIY Christmas Coke Can Santa Holder :

1 . Make sure your Coke can is cleaned. Cut out the top part of the can but keep the opener, you will need it to make a Santa’s belt.

2. I continue with cutting out the top part of a Coke plastic bottle. I choose Coca Cola for the can and plastic bottle because it’s red, Christmas color indeed.

3 .Get white lace and glue it around and don’t forget to make some ripple, until it looks like a Christmas tree. Don’t forget to add a red ribbon with a bow, to make a good finish on the bottle’s cap. i glue it to secure the ribbon on the cap.

4. Followed by making a Santa’s belt. I used an old bra’s strap, yeah, full recycling project, lol. You can use leather belt or ribbon. Use black one and insert it into the can’s opener. Then glue it around the Coke can. Let it dry.

5. Put together the lacey Christmas tree as the hat/cover to the Coca cola can holder or you may say a Santa’s belly. Finished!

You can make this cute Coke can for candy holder as many as you want. Mixed between slim or regular Coca Cola can and it will look great as centerpiece or as decoration for your Christmas mantel. Be creative and make different cap, not just Christmas tree like mine. Have fun!

Now, let’s take a look at what the other Sustainable Pinterest Challenge participants have made for their “Christmas” challenge.

Julie | Sum of their Stories

Gail | Purple Hues and Me

Julie | Treasures Made From Yarn

T’onna | Sew Crafty Crochet

Mel | Decor Craft Design

Niki | Life as a LEO Wife

Christine | Christine’s Crafts

Vicky | Vicky Myers Creations

Donna | Modern on Monticello

Allyson | Southern Sunflowers

Ann | The Apple Street Cottage

Jo | A Rose Tinted World

You are invited to the Inlinkz link party!

Click here to enter

https://fresh.inlinkz.com/js/widget/load.js?id=c0efdbe6b4add43dd7ef

Christmas crafts 2

Here’s the list of projects :

How to make Festive Gift Tags from old business cards

Glitter Foam Christmas Tree Ornaments

Easy Upcycled Crochet Christmas

How to make a Toilet Roll DIY Advent Calendar

Vintage Satin Ornament

Knitted Gift Bag

Christmas Burlap and Denim Wreath

DIY Toilet Roll Gnomes

DIY Christmas Can Holder

Christmas Card Holder

DIY Candy Christmas Decoration

Easy Kids Crafts Christmas Tree Decoration

For more of my future Fall posts, please follow me! And if you wanted to add my creations to your Pinterest boards, please follow me on Pinterest! Also find me on Instagram and Twitter!

For creative fellow bloggers, don’t forget to join You’re The Star” Blog Hop, Happiness Is Homemade Link Party and Home Matters Linky! Link your inspiring posts (anything, from recipes, home decor, DIYs, crafts, family, health to gardening) every Monday and Sunday. Get a change to be featured! I’m one of the co-host of You’re The Star blog hop for Creative Week and Happiness Is Homemade; I will choose the creative posts to be featured on Creative Features week and on Happiness Is Homemade. Please come and join the blog hop and I would love to see you there! Please join and share the news!