DIY Valentine Heart Sign Upcycled Pistachio Shells

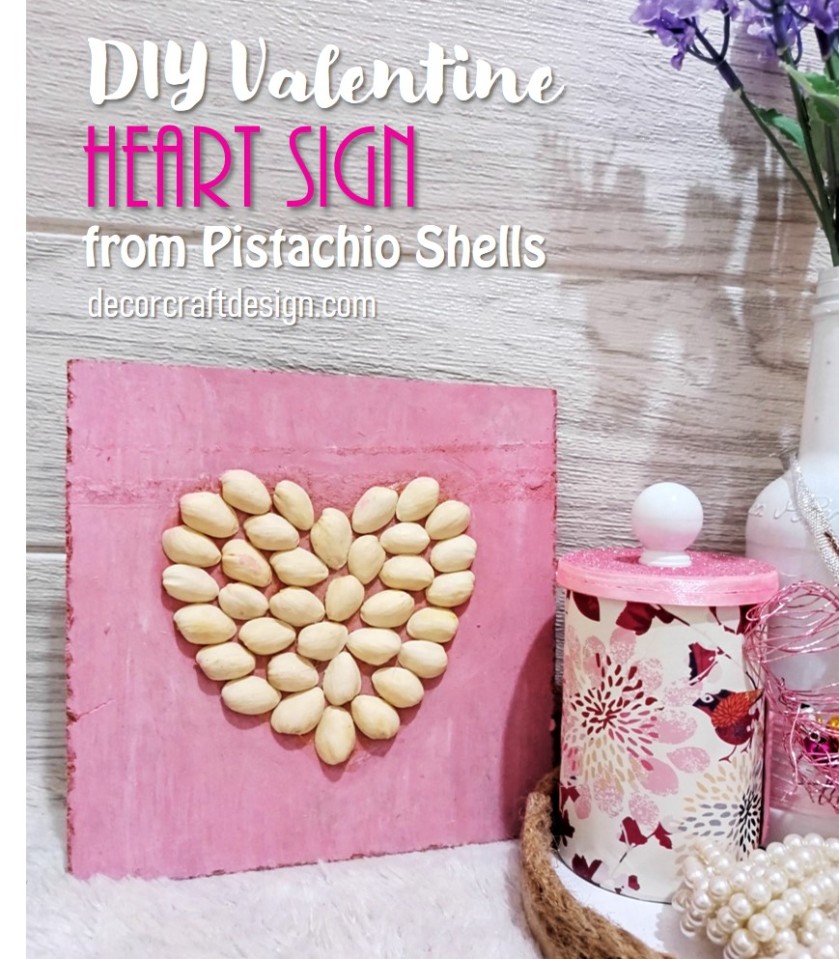
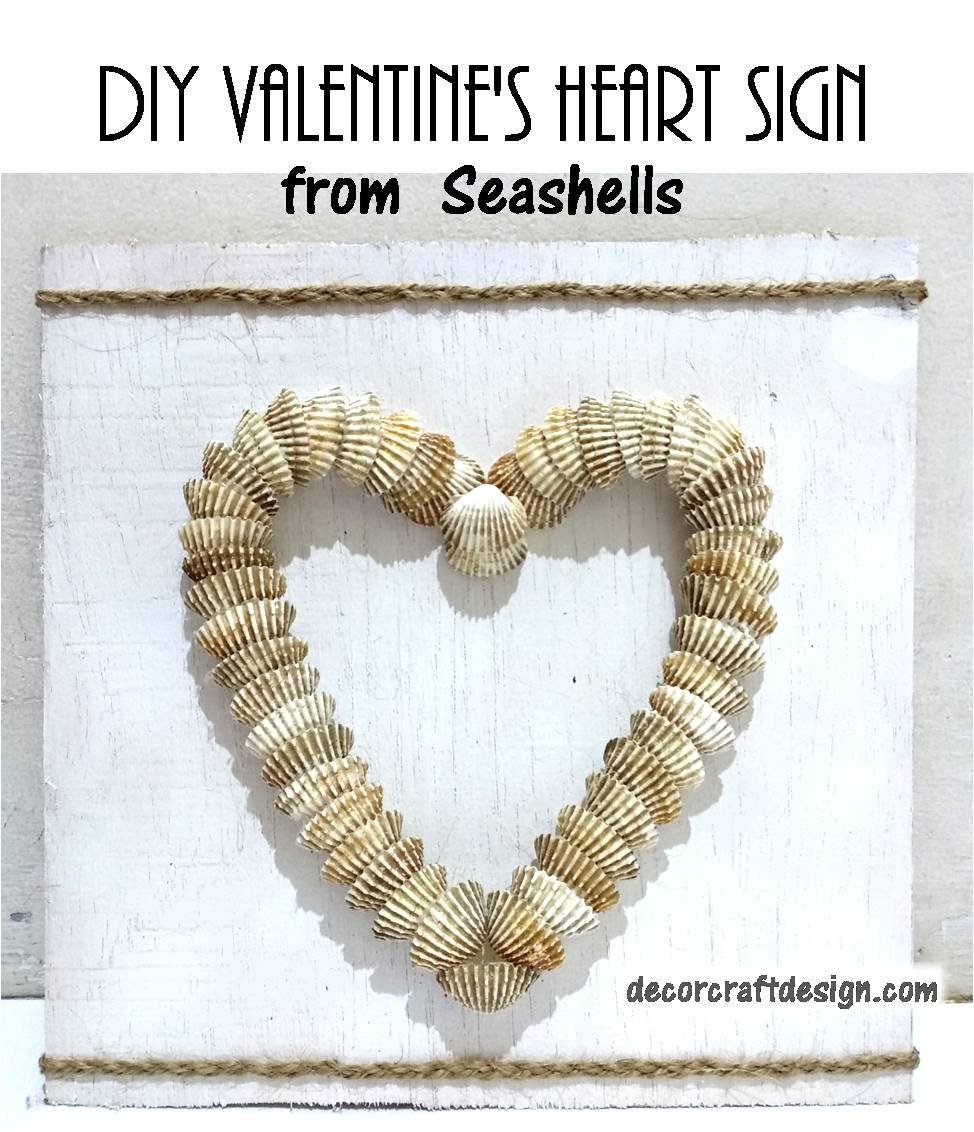
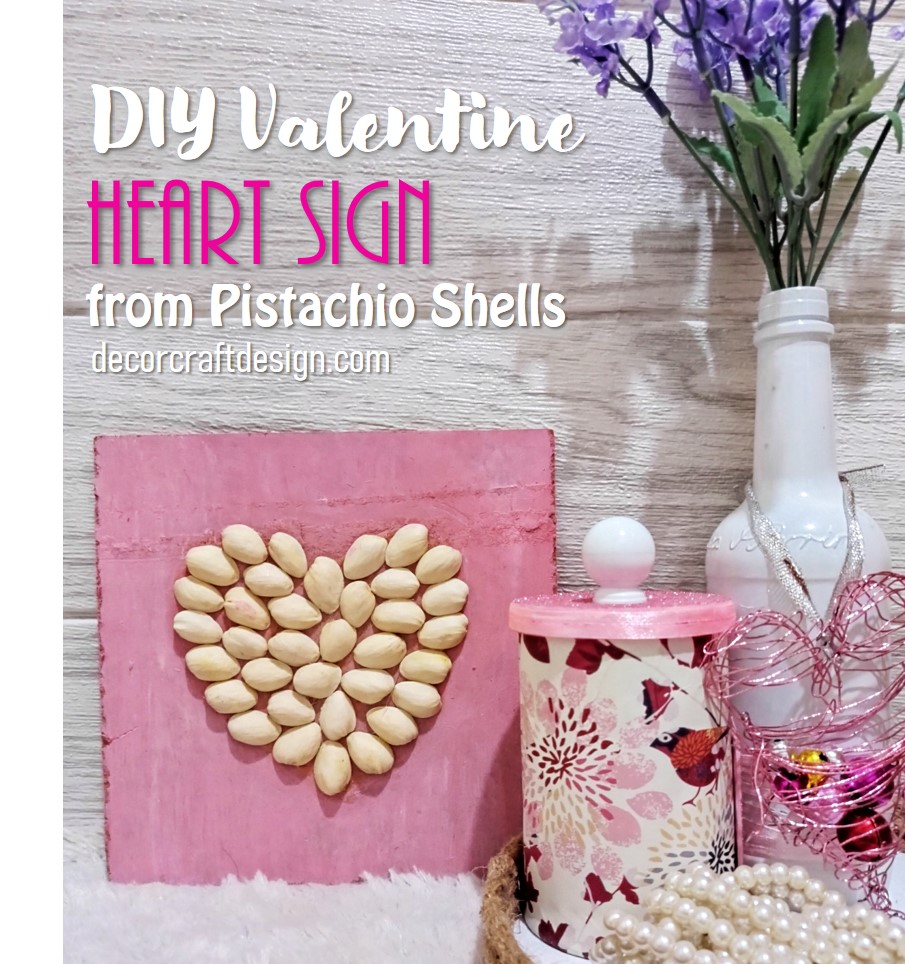
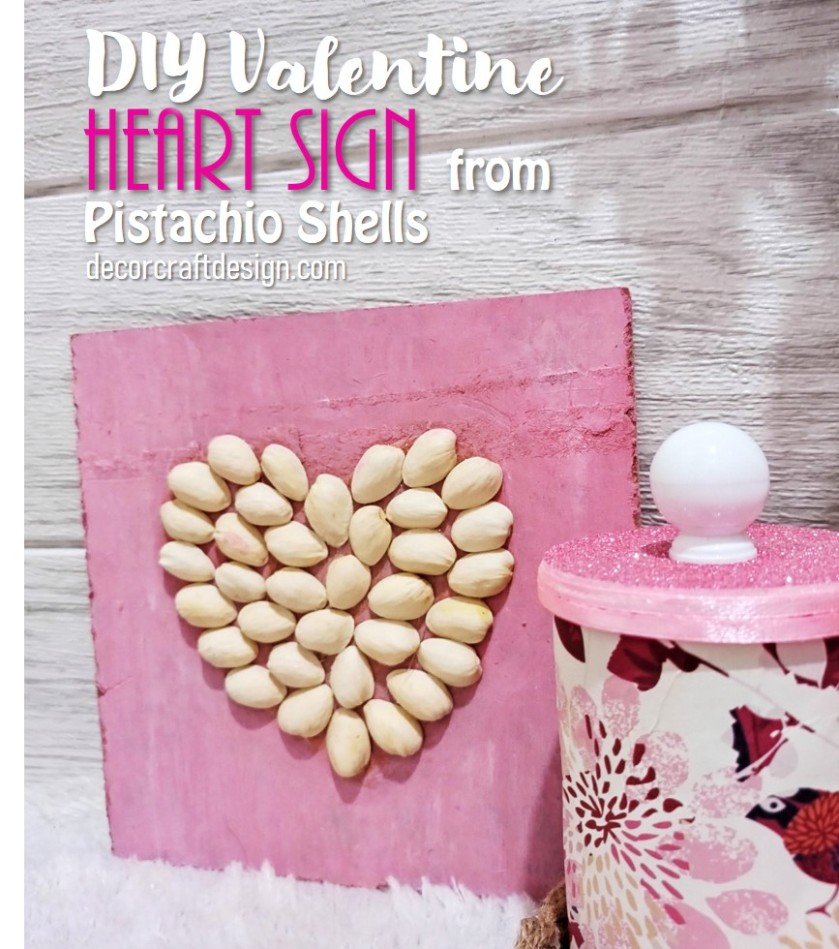
Valentine’s Day is coming! Very excited for this Valentine’s Day. I love Valentine’s Day because I can show and treat my loved ones with lots of love in a special way. Shower them with my lovely creativity. If you agree with me, you can start with a handmade Valentine’s Gift Box, Valentine’s Gift Tags, to personalized Valentine’s Gifts. Moreover, you can make a DIY Valentine’s decoration as a gift to your loved ones. Like this Valentine’s sign that I made. This Valentine’s Sign is not just usual decoration, but it’s made from pistachios shells. Yes, pistachios shells are great material for crafting too. So far, I have made Sunflower from pistachios shells, acorn, some flowers. So, don’t just throw away pistachios shells, it can be a beautiful craft. Let’s find out more! 

Things To Prepare

Easy supplies you can get or have in your craft room for this DIY Valentine Heart Sign Upcycled Pistachio Shells. Try to replace it with something similar to my materials if you don’t have the same one. Just use whatever you have at home like I do. Use more recycled things and use some scraps from previous projects. I guess that’s one of a best way to stay sustainable. Let’s see what are the list of supplies for this DIY Valentine Heart Sign Upcycled Pistachio Shells :

  • MDF board
  • Pistachio Shells
  • Pink paint (you can mix red with white paint)
  • Hot glue

How To Make

It’s an easy Valentine Sign project which you can make in a short time. Anyway, follow these easy steps on how to do DIY Valentine Heart Sign Upcycled Pistachio Shells

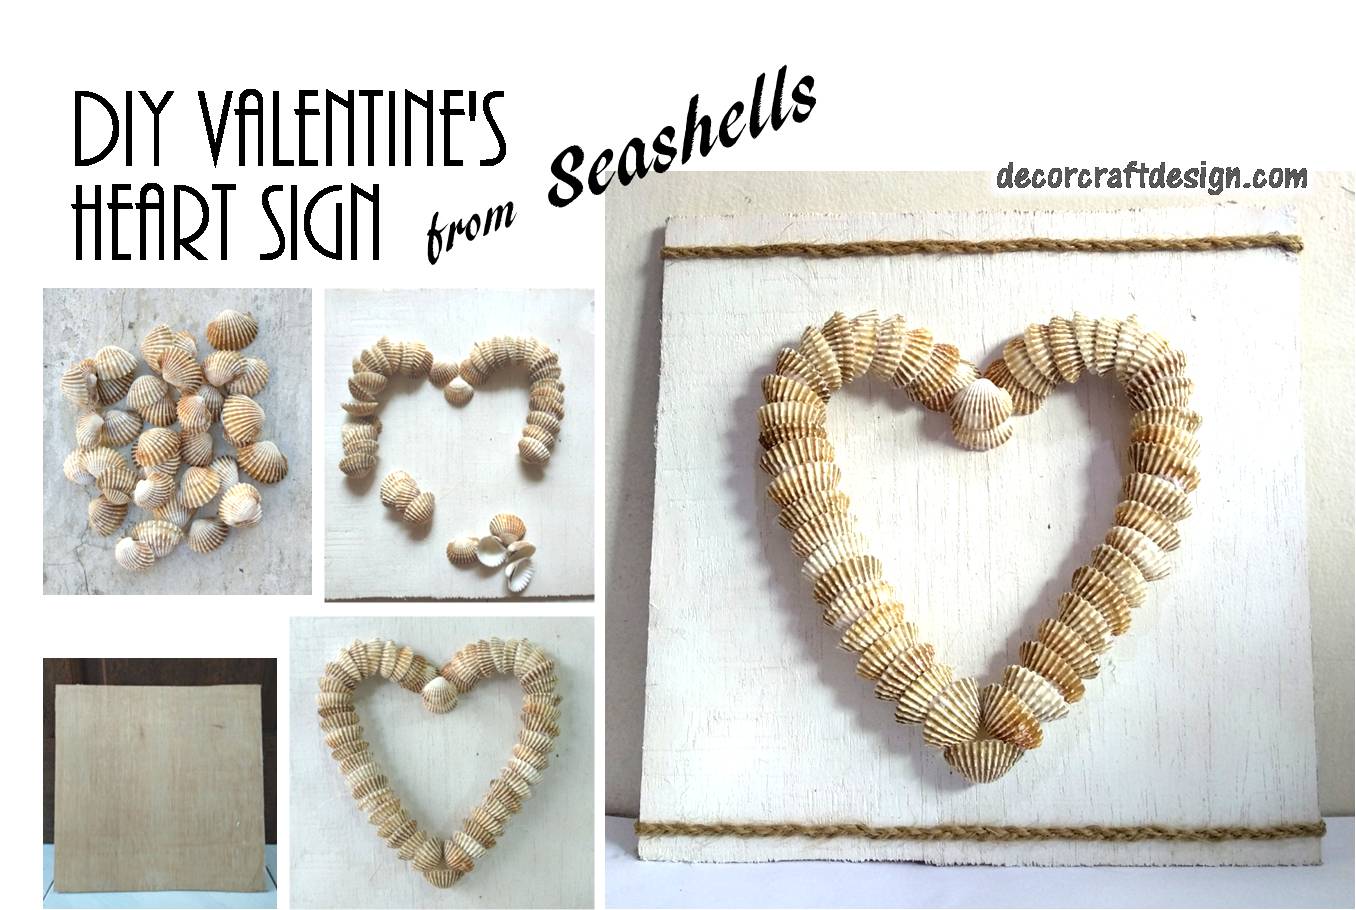
1. Paint the board with pink paint. Let it dry.

2 . Draw a heart shape with pencil if you need it as a guideline to shape your pistachio shells into a heart shape.

3. Start pasting your pistachio shells one by one with hot glue gun until you form a heart shape. Finished!

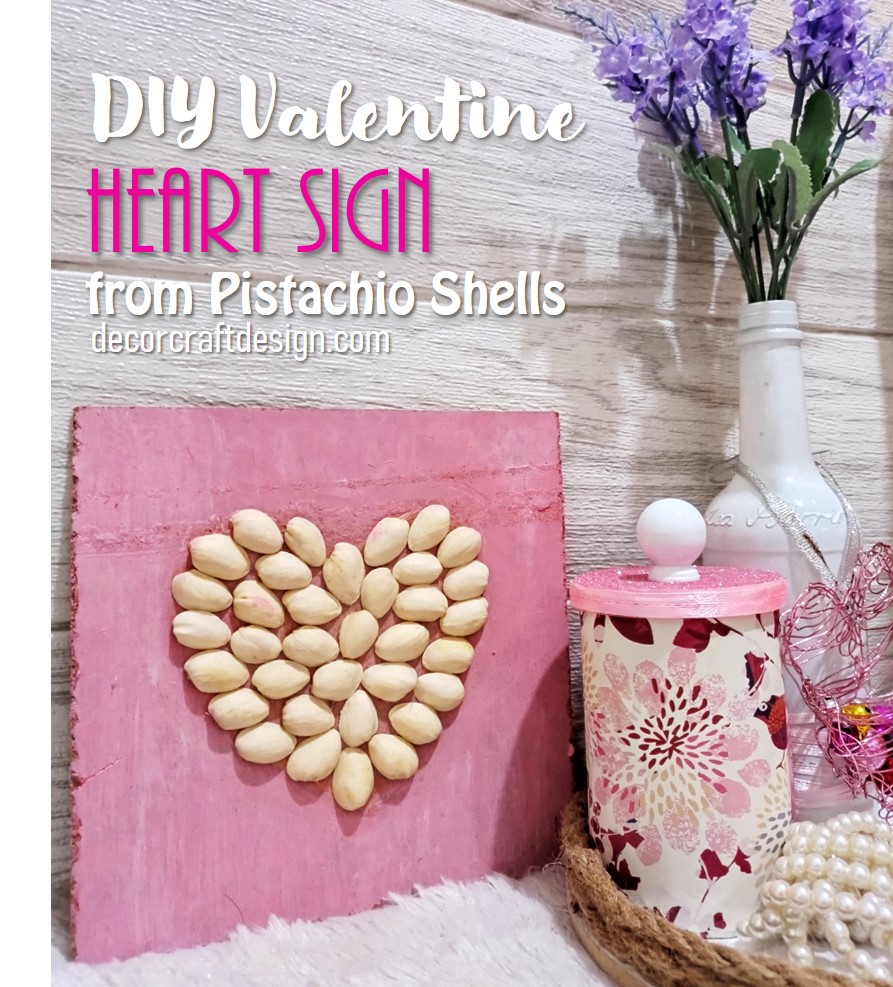
Beautiful and easy Valentine project to make and a great recycling project for Valentine’s Day. You can display it with proud by your mantel. It’s an adorable Valentine decoration!

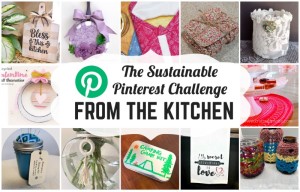
This DIY Valentine Heart Sign Upcycled Pistachio Shells project is my contribution to The Sustainable Craft Challenge Blog Hop hosted by Julie with her beautiful blog Sum of Their Stories. It’s a craft challenge with a sustainable principle behind it (upcycling, recycling, repurposing), which comes in different theme for every month. This month, the theme is “Heart” and last month has no challenge, it’s a break. I love to be part of this challenge as I love to upcycle things into something new, beautiful and useful.

Now, let’s see what other blogger’s projects!

Sum of their StoriesScrap Fabric Hearts
Our Good LifeDIY Hearts Machine
Purple Hues and MeSoda Bottle Heart Shaped Box
Decor Craft DesignDIY Valentine Heart Sign Upcycled Pistachio Shells
Sew Crafty CrochetCrochet Patchwork Heart
Life as a LEO WifeDIY Faux Concrete Bunny
Old Rock FarmhouseDoodle Hearts Collage
Christine’s CraftsSmall Crochet Hearts
Mimi – A Great Name for GrandmaDIY Valentine Rag Wreath Heart

For more of my future Valentine’s Day posts, please follow me! And if you wanted to add my creations to your Pinterest boards, please follow me on Pinterest! Also find me on Instagram and Twitter!

For creative fellow bloggers, don’t forget to join You’re The Star” Blog Hop, Happiness Is Homemade Link Party and Home Matters Linky! Link your inspiring posts (anything, from recipes, home decor, DIYs, crafts, family, health to gardening) every Monday and Sunday. Get a change to be featured! I’m one of the co-host of You’re The Star blog hop for Creative Week and Happiness Is Homemade; I will choose the creative posts to be featured on Creative Features week and on Happiness Is Homemade. Please come and join the party!

Upcycled Valentine Wall Decoration

I was so excited when Julie from Sum Of Their Stories invited me to join her Monthly Sustainable Pinterest Challenge. What is this Sustainable Pinterest Challenge? For the explanation, scroll down below, I just copy paste it from Julie. Lol, I hope she doesn’t mind.

The Pinterest Challenge has had a bit of a reboot for 2022 and is now the Sustainable Pinterest Challenge. Each month I join a group of creative bloggers and we select a pin or two to we feel inspired by and give it a go. Starting in January 2022 the Pinterest Challenge has a sustainable, eco friendly twist to it. All the projects shared will have something about them that involves recycling, upcycling, a general ethos of reducing waste and using what we have. It’s not about beating ourselves with a stick, it’s just about giving thought to how we can make small changes in our lives just a little more sustainable and reduce our impact on the environment.

This month the theme is “From The Kitchen” so I thought of my broken baking pan right away. I couldn’t use it anymore as it’s already leaked, but I still keep it. Yup, I’m a bit of a hoarder. Then I spotted a round wall decoration on Pinterest which inspired me to make use of the ring side of my old baking pan into a Valentine Wall Decoration. I incorporated my Valentine Card from CD into this project. So, let’s find out more on how I made it.

Things To Prepare

For this upcycling project, I took my old project of Valentine Card From CD as one of the main ornament. So, this is actually an upcyling upcycled project. LOL! I sometimes do that if I think of new idea of incorporating my old project with the new one. And this Valentine wall decoration is a great way to preserve your precious Valentine card from your loved one. Anyway, let’s see what I use to make this Upcycled Valentine Wall Decoration:

  • A Valentine card made out of CD (click to learn how I made it) or you can use any of your Valentine card or ornament.
  • Old baking pan (just use the outer ring side, it’s a removable baking pan – springform pan)
  • White paint
  • Pink checkered ribbon
  • Gold ribbon
  • Glue

How To Make

It’s so easy to make, and super quick. Most of all it’s an upcycling decoration from the kitchen. Now, gather all the supplies which I’ve mentioned above and follow these easy steps on how to make Upcycled Valentine Wall Decoration :

1 . Take the old outer ring of the springform pan and clean it. Let it dry. Then you can paint it effortless with white paint to make a rustic look which I like. Leave it to dry.

2. Continue with inserting the ribbon hanger of the CD Valentine Card in the pan’s lock. Secure it.

3 .Make a ribbon out of gold and pink checkered ribbon. Paste the ribbon to the top of the ring, by the lock. Done! Hang it somewhere that you like to decor your home with Valentine’s vibes.

Now let’s take a look at what the other Sustainable Pinterest Challenge participants have made for their “From The Kitchen” challenge.

You are invited to the Inlinkz link party!

Click here to enter

https://fresh.inlinkz.com/js/widget/load.js?id=a8b40ada7693d64e5923

Julie | Sum of their Stories

Gail | Purple Hues and Me

Terri | Terri Steffes

Ann| The Apple Street Cottage

T’onna | Sew Crafty Crochet

Julie | Treasures Made From Yarn

Lydia | Life Beyond the Kitchen

Allyson | Southern Sunflowers

Mel | Decor Craft Design

Donna | Modern on Monticello

Linda | Crafts a la mode

Niki | Life as a LEO Wife

Kitchen Storage Jar to Pretty Vase

Upcycle Fry Pan DIY

Upcycled Valentine Wall Decoration

DIY Tea Towel

Cakeplate Makeover and Valentine

Jelly Jar Sewing Kits

Vintage Lace Tealight Holder

How to make Reusable Sandwich Wraps

Crochet Dishcloth and Sponge Set

Repurposed Altoid Tin to Camper Games

Wooden Cutting Board Makeover

Crochet Jar Covers

For more of my futureValentine posts, please follow me! And if you wanted to add my creations to your Pinterest boards, please follow me on Pinterest! Also find me on Instagram and Twitter!

For creative fellow bloggers, don’t forget to join You’re The Star” Blog Hop, Happiness Is Homemade Link Party and Home Matters Linky! Link your inspiring posts (anything, from recipes, home decor, DIYs, crafts, family, health to gardening) every Monday and Sunday. Get a change to be featured! I’m one of the co-host of You’re The Star blog hop for Creative Week and Happiness Is Homemade; I will choose the creative posts to be featured on Creative Features week and on Happiness Is Homemade. Please come and join the blog hop and I would love to see you there! Please join and share the news!

DIY Valentine Burlap Sign

Preparing for Valentine’s day is fun and full of the feeling of love. It’s still weeks to go, but I really want to share one by one my Valentine’s day ideas. On today, I will start with the easiest Valentine decoration, which I made a DIY Valentine Burlap Sign. It’s nice to hang this Valentine cloth sign anywhere in your home. And it will look great with farmhouse Valentine theme.

I choose burlap to show some different look for usual Valentine which is pink and soft looking. Burlap is more rustic and full of texture. I made the Valentine burlap sign in white color and pair it with delicate white lace. Well, if you fond of farmhouse style or you are looking for something different for Valentine’s day decor, my DIY Valentine Burlap Sign would be a great inspiration.

Easy to make I can assure you and simple craft supplies that you need to prepare. So, it’s a quick DIY you can make together with your kids. scroll down more to get more details on the things you need to prepare and step by step tutorial for my DIY Valentine Sign from Burlap and Lace.

Things To Prepare

These are simple materials to use. Easy to find and inexpensive. I’m sure you will have fun with the 3d art glue paint; it’s a texture paint. If you don’t have or can not find the 3D art glue paint, you can use white hot glue. But it’s easier to work with 3D art glue paint, especially in lettering than using hot glue gun. Anyway, here are the things I used for my DIY Valentine Burlap Sign:

  • Burlap
  • White lace
  • UHU glue
  • 3D art glue paint in white color

How To Make

It is a simple and super easy cloth sign to make for Valentine decoration. You can write or draw the hearts in different way you like. Make use of your creativity to make it personal Valentine sign for you. Let me share step by step how I made my Valentine sign from burlap:

1. Cut some burlap in rectangle shape, the size is up to you, just remember to have it in 1:3 composition. It would look nice.

2. Glue a piece of white lace on top and bottom of the burlap sign. Let it dry.

3. Now write “Our” on top and followed by the drawing of heart shapes. Be creative with the heart shapes, the size, the amount and how you present the shape. All by using 3D art glue paint in white color. Let it sit for a while until it’s perfectly dry.

4. I have this side of burlap that I cut and used as the hanger for this Valentine sign. Secure it with glue. You can substitute it with burlap rope.

Easy and short steps to make a Valentine decoration that you can place it anywhere your home. You can hang it on your kitchen cabinets by making it more than one; or hang it in front of your doors at home; or hang it on your mantel, anywhere you like. My DIY burlap sign will suit nicely with a farmhouse decor.

For more of my future Winter and Valentine posts, please follow me! And if you wanted to add my creations to your Pinterest boards, please follow me on Pinterest! Also find me on Instagram and Twitter!

For creative fellow bloggers, don’t forget to join You’re The Star” Blog Hop and Happiness Is Homemade Link Party! Link your inspiring posts (anything, from recipes, home decor, DIYs, crafts, family, health to gardening) every Monday and Sunday. Get a change to be featured! I’m one of the co-host of You’re The Star blog hop for Creative Week and Happiness Is Homemade will choose the creative posts to be featured on Creative Features week and on Happiness Is Homemade. Please come and join the blog hop and I would love to see you there! Join and share the news!

See you!

Be lovely creative!

Mel

DIY Valentine’s Heart Sign From Seashells

Valentine’s day is only days to come, my DIY Valentine’s Heart Sign From Seashells would be one of the perfect Valentine’s decoration or Valentine’s gift idea. It’s an easy Valentine’s DIY and a great use of seashells that you can get from your kitchen after a nice meal. I left the seashells as it is without adding color to it, just washed it clean to get a rustic style for the heart sign.  Honest as it is just like a love. It’s will blend well with farmhouse decor too.

Picture35

Things To Prepared

  • Seashells (make sure it’s cleaned)
  • Wooden plank in square
  • White paint
  • Hot glue
  • Burlap rope

Picture37

How To Make

Let me share with you how easy the steps are to make this DIY Valentine’s Heart Sign From Seashells.

  1. Have the wood plank painted in white. Do it roughly to get the rustic look. Let it dry.
  2. Arrange the seashells in heart shape and glue it one by one with hot glue.
  3. Braided burlap rope used to give some frame to the seashells heart. Glue the burlap rope on top and below the heart sign and secure it with hot glue on the back of the sign.

Picture38

It’s a great re-purposing project for Valentine’s decoration or even a Valentine’s gift. It’s easy to make, so you still have time to make the heart sign from seashells before the Valentine’s day. Have fun making it and don’t forget to add love while doing it!

For more of my future Winter and coming Valentine‘s posts, please follow me! And if you wanted to add my creations to your Pinterest boards, please follow me on Pinterest! Also find me on Instagram and Twitter!

Picture39

Pinterest-iconImage result for instagram buttonRelated image

For creative fellow bloggers, don’t forget to join “You’re The Star” Blog Hop ! Link your inspiring posts every Monday and get a change to be featured! I’m one of the co-host of the blog hop for Creative Week and will choose the creative posts to be featured on Creative Features week. Please come and join the blog hop and I would love to see you there! Join and share the news!

See you!

Creative In Love!

Mel