DIY Rustic Farmhouse Wreath

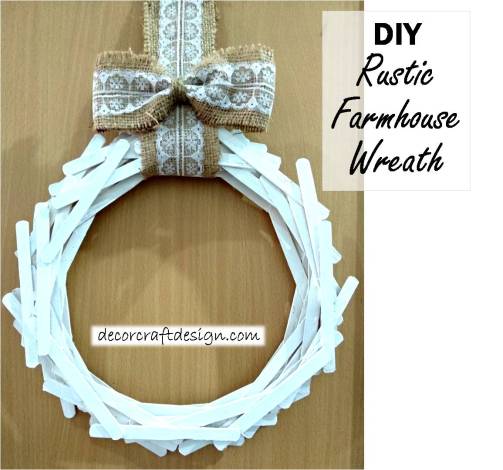
I made a DIY Rustic Farmhouse Wreath from ice sticks and decorated with lacey burlap ribbon. It’s very easy wreath to make and you don’t need lots of material to make it looking good. It’s simple and minimalistic wreath with rustic farmhouse style. So for those who has a farmhouse style home and love rustic decor look, it’s a great DIY wreath to make.

There are many rustic wreath made from dried twigs, roots, wood slices; but I try to use unfamiliar material for a wreath at the same time a very common craft supplies, popsicle sticks. It’s a quick wreath to do and has a simple farmhouse look which I love. Short and simple list of craft supplies is needed and easy steps on how to make this popsicle sticks wreath are being explained here with tutorial pictures. Anyway, let’s start with things you need to prepare.

Picture45

Things To Prepare

It may took more than 50 ice sticks to make my rustic farmhouse wreath. Ice stick is a cheap supplies you can get from any craft store. The complete list of things you need to prepare for this farmhouse DIY are:

  • Popsicle sticks
  • Burlap
  • White lace
  • Organic rope
  • White spray paint
  • UHU glue

Picture43

How To Make

This is a very easy and quick wreath that anyone can make. So, just follow these steps below and with a little guide from the picture above; I’m sure you can make my DIY Rustic Farmhouse Wreath

  1. Take the ice sticks and form a circle by gluing them to each other.
  2. Repeat the gluing ice sticks in form of circle again and again in different angles until you get the proper thickness and width of a wreath.
  3. Spray paint the popsicle sticks wreath with white paint. Let it dry.
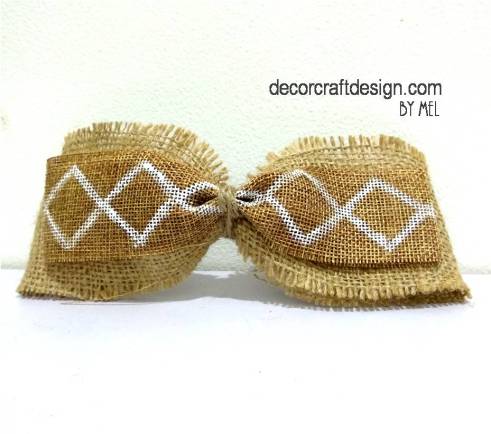
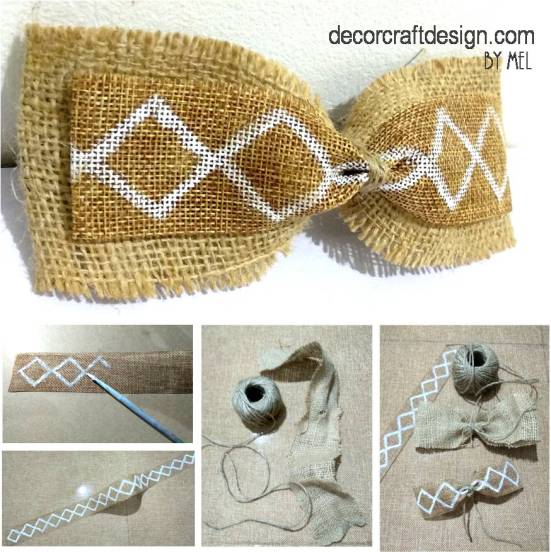
  4. Get a burlap and cut it in into a wide ribbon. Glue a lace on top of the burlap and you got yourself a lacey burlap ribbon.
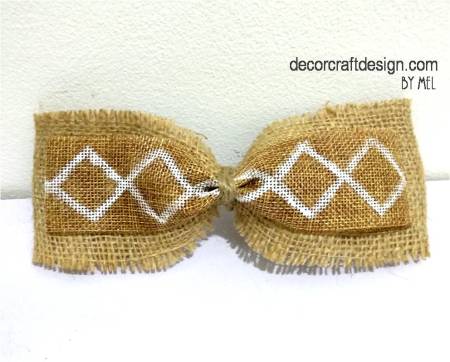
  5. Cut some of the lacey burlap ribbon and make a bow that tied by organic rope. And use the rest of the lacey burlap ribbon to hang the ice stick rustic wreath.
  6. Attach the burlap bow on the wreath’s burlap hanger. Finished!

Picture44

This DIY Rustic Farmhouse Wreath from ice sticks with lacey burlap would look great on your front door or above your mantel. Especially to tie in with your farmhouse style home decor. It’s easy to make and has a very simple look, so you still have tons of possibilities to be creative with the wreath to make it more personal to you by adding more ornament to the ice sticks wreath. Happy trying!

For more of my future Spring posts, please follow me! And if you wanted to add my creations to your Pinterest boards, please follow me on Pinterest! Also find me on Instagram and Twitter!

Pinterest-iconImage result for instagram buttonRelated image

Picture47

For creative fellow bloggers, don’t forget to join “You’re The Star” Blog Hop ! Link your inspiring posts every Monday and get a change to be featured! I’m one of the co-host of the blog hop for Creative Week and will choose the creative posts to be featured on Creative Features week. Please come and join the blog hop and I would love to see you there! Join and share the news!

See you!

Pin a creativity!

Mel

Picture46

Easy DIY Napkin Rings For Thanksgiving -Two Farmhouse Looks

Preparing for Thanksgiving dinner is taking a lot of efforts. You may consider to prepare some Thanksgiving dinner details in easy and simple way. I have this idea of making a very easy DIY Thanksgiving napkin rings with two farmhouse looks. Easy steps and quick to make, and took only a few things to prepared, so it’s very simple Thanksgiving diy.

Things To Prepared

I only prepared 3 materials for this project with some glue. It’s a super easy napkin ring for a Thanksgiving dinner.

  • Flower wire
  • pumpkin wooden ornament ( I made it from balsa wood and painted it in white on one side and blue on the other side; plus a written guest’s name)
  • Burlap
  • UHU glue

Picture40

How To Make

Very simple and quick step to make this Thanksgiving DIY of napkin rings and I made it in two farmhouse looks for you to favor. This is how I made :

  1. Take the flower wire and bent it to form a spring with a size of a napkin roll.
  2. For the first minimalist farmhouse look, just simple glue the blue pumpkin ornament on the right of the spring flower wire. Use the napkin ring to secure the napkin.
  3. Take the spring flower wire and glue it with white wooden pumpkin ornament for the second napkin ring style.
  4. For the second farmhouse look, take a burlap around 2.5 inches wide and roll it on the napkin and secure it with the white pumpkin napkin ring.

Picture42

One look is a minimalist look with a touch of farmhouse style; and the other look is warmer look of farmhouse style. Both can be your inspiration for your Thanksgiving tablescape napkin ring. A name of your beloved guest is presented in a wooden pumpkin ornament. A very quick and easy DIY Thanksgiving napkin ring with two inspirations of farmhouse looks.

Picture43

For more of my future Fall and Thanksgiving posts, please follow me! And if you wanted to add my creations to your Pinterest boards, please follow me on Pinterest! Also find me on Instagram and Twitter!

Pinterest-iconImage result for instagram buttonRelated image

Picture41

And for creative fellow bloggers, don’t forget to join “You’re The Star” Blog Hop ! Link your inspiring posts every Monday and get a change to be featured! Starting June 2019, I will be co-hosting the blog hop and would love to see you there! Join and share the news!

See you!

Be creative!

Mel

How To Make Painted Farmhouse Burlap Ribbon Bow

Today I want to show you on how to make painted farmhouse burlap ribbon bow. This is not just saving some money to buy fancy patterned burlap ribbon, but to have a personalized pattern of the burlap ribbon too. How great it is if you can match the pattern you painted on the burlap ribbon bow with the project that you wanted that needs some burlap bow. You don’t have to buy so many burlap ribbon with different pattern, you just need to paint it as desired.

Picture44

There are a few things you still need to prepare to make farmhouse burlap ribbon bow, although it’s a very simple project; which are:

  • Natural burlap (stiff type and soft type)
  • White acrylic paint
  • Natural burlap rope

Picture43

How To Make Painted Farmhouse Burlap Ribbon Bow by yourself? Let’s check out these steps:

  1. Cut the stiffer natural burlap in the size of desired ribbon, mine was 1.5 inches (4 cm)
  2. Cut the softer natural burlap in the size of desired ribbon, mine was 3 inches (around 8 cm)
  3. Paint the stiff burlap ribbon with desired pattern, mine was geometric pattern that matches the diy project I made which was crossed wire on DIY Farmhouse Sign Wire Rack. Paint by using white acrylic paint. Let it dry.
  4. Tie the soft burlap ribbon into a bow by using natural burlap rope.
  5. Tie the stiff burlap ribbon into a bow by using natural burlap rope.
  6. Tie together the soft and stiff burlap bow with natural burlap rope. Secure it!
  7. Finished! Now you have your own fancy farmhouse pattern burlap ribbon bow.

Picture45

Easy to make with amazing result, paint it or stamp it, you can choose your best trick to make this Painted Farmhouse Burlap Ribbon Bow. Got inspired? I hope you do and try your own patterned painted burlap ribbon bow in farmhouse style! Happy trying and Happy Mother’s Day!

Picture34

See you!

Make yourself creative!

Mel

Shabby Farmhouse Style Of Organized At Home – Work Station

Shabby Farmhouse Style Of Organized At Home – Work Station


I love to sketch some interior of one area, or one room or simply one function. This a small functional area at home that I had in mind. A work station, yes, an area that often neglected in term of home decor or styling. Actually, work station at home is a very significant place for us to gain our creativity, inspiration, and mood. For me, a work station should be:

1. Organized and in-order

So it would not be difficult to work; like finding things we need, finding un-clutter space to work,  bring some peaceful mind to work. So here’s what to do:

  • Tidy up your working station, organized your stuff and keep it in wall organizer, drawer, boxes, etc.
  • Organized your activity every day, like making a to-do list, reminders and organized it on wall boards.
  • Always leave enough empty space in your desk, do not stack all your stuff on your desk, leave some room for your creativity to take the stage.

Picture31

2. Beautiful and stylish

This is the most important ingredient in mood and inspiration recipe. Great looking work station and personal favorite touch will boost your creativity; well at least I do. so, style your work station with your favorite things, colors, patterns, style. in the end, your very personal touch will shown on your at home – work station.

Picture32

Pinterest-icon

In my design of this mini at home-work station, I choose to finish it with blue shabby farmhouse style. It is calm and sweet with the shabby touch and have strong character from the rustic look of farmhouse style.

The drawing is using drawing pen that I finished with watercolor pencil. It is a drawing that you can add anything later to expand the design of the room. Well, maybe I will do that someday 🙂

Picture33

Well, I hope you enjoy my design of this small area of organized at home – work station with shabby farmhouse style.

Please follow me for more creations, designs and ideas!


See you!

Let your creativity loose!

Mel