How To Make Red White Blue DIY Bottles With Coastal Touch

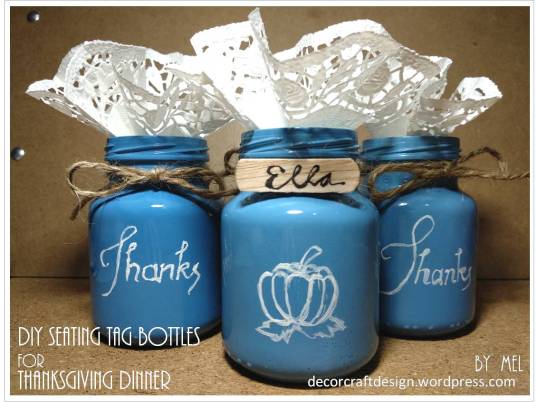
I have this idea of combining patriotic decoration with coastal touch. If you come to see, it has same colors theme, which are red, white and blue. When I think of the red white blue, I think of the flag with the stars; and when I think of seaside, I think of starfish. Isn’t that a great coincidence, points of connections between patriotic theme with coastal theme. Two themes come together and easy to make, interested? Let me share you the tutorial.

Picture118

What to prepare to make this nautical project for 4th July decoration?

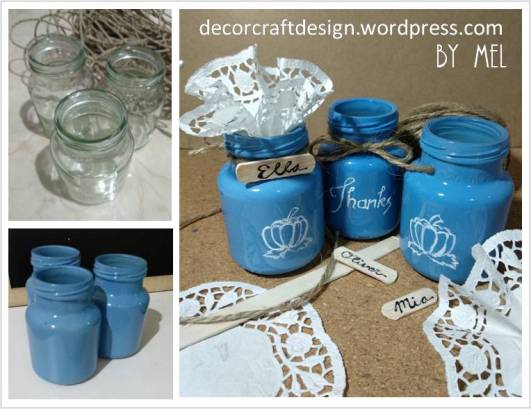
  • Used three glass bottles (small, medium or big is up to you, but remember to have the right proportion with the starfish), I used small sizes bottles
  • Small dried starfishes
  • Red, white and blue paint
  • Organic hemp rope
  • Glue

Picture115

How to make Red White Blue DIY Bottles With Coastal Touch:

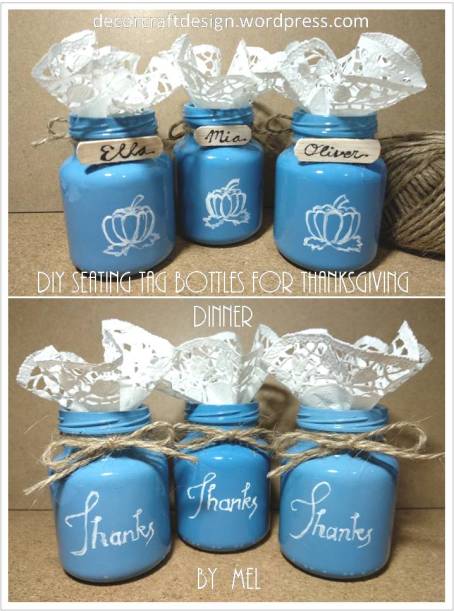
  1. Clean and dry the bottles. Paint each with red, white and blue paint. Spray paint or acrylic paint will do. But it’s going to be a lot easier with spray paint and more equally in term of shade and covering the surface. Let it dry.
  2. Glue the hemp rope to each bottle on the bottle’s mouth. Let it dry.
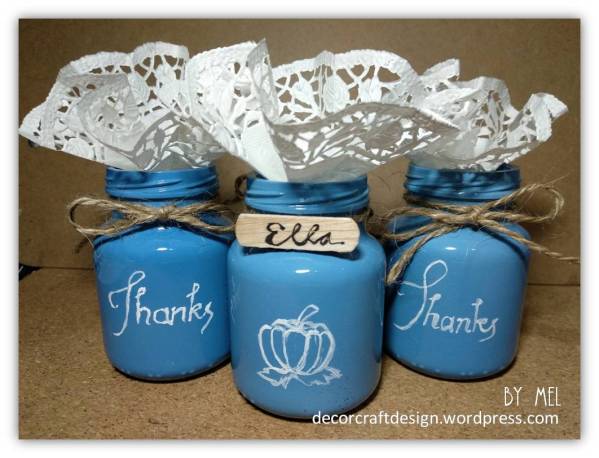
  3. Glue the starfish each one to each bottle. Let it set. Finished!

Picture117

Super fast, super easy, less money, great upcycling and you can use this nautical decorated painted bottles along summer, because not just it fits the 4th of July celebration, but also it’s easily goes with coastal theme. I hope my Red White Blue DIY Bottles With Coastal Touch inspiring and find the tutorial easy on how to make it.

For more future Nautical Summer theme posts, please follow me! And if you wanted to add my creations to your Pinterest board, please follow me on Pinterest! Also find me on Instagram!

Pinterest-iconImage result for instagram button

And for creative fellow bloggers, don’t forget to join “You’re The Star” Blog Hop ! Link your inspiring posts every Monday and get a change to be featured! Starting June 2019, I will be co-hosting the blog hop and would love to see you there! Join and share the news!

Picture116


See you soon!

Sea with creativity!

Mel


I entered challenges :

  1. International Art & Soul – Stars and/or Stripes
  2. Altered Eclectics – AG

DIY Seating Tag Bottles For Thanksgiving Dinner

DIY Seating Tag Bottles For Thanksgiving Dinner


After I finished my grateful thanksgiving sign, I was inspired to make seating tag out of used mini bottles I had. With blue and white colors with natural touch of wood and rope. This upcycling bottles project would be a great functional decoration to complete your lovely thanksgiving dinner party.

What did I prepare for this seating Tag mini bottles :

  • Mini glass bottles (Find any used mini bottles you can get from any drinks)
  • Blue spray paint
  • White Acrylic paint
  • Paint Brush
  • Organic rope
  • Ice sticks
  • Black ink pen
  • Small doily paper
  • Glue
  • Scissors

Picture66

These are steps I took to make the Thanksgiving tag:

  1. Clean the used bottles and dry it thoroughly.
  2. Spray paint the bottles with blue paint. Let it dry.
  3. Paint each bottle with pumpkin on one side and paint the word “Thanks” on the other side by using brush with white paint. Leave it dry. You can always do the easier way with stickers or decoupage to skip the hand painting job.
  4. Tie each bottle with organic rope to give an earthy feeling of fall season. The ribbon is on the “Thanks” side and the name tag on the pumpkin side.
  5. For the name tag, write down the name of your guest on the ice stick with a black ink pen and then cut the ice stick with beveled edges.
  6. Stick the ice stick name tag on the organic rope by the pumpkin side.
  7. Fold the doily paper and shape it into a flower. Slip each doily on top of each bottle.
  8. My seating tag is ready for the thanksgiving party! Easy DIY!

Picture69

It turned out to be one of my favorite upcycling bottles project besides two of my other diy painted bottle projects ( Fall Leaves and Geometric Gold ). I love the color blue meets the white and the natural wood tag with organic rope ribbon; and of course the hand painted “Thanks” and pumpkin. And the amazing thing is, you can use this seating tag bottle as a souvenir to thank your guest too! How? Just fill up the mini bottles with some fine chocolates or sweets or even some potpourri. In that way, you have yourself a seating tag and souvenir in one bottle! Isn’t that great?! Nothing is wasted, but everything is pretty and everyone is happy!

Picture67

See you all!

Be creative and thankful!

Mel

Picture68


I entered challenges for my diy seating tag bottles on:

  1. Try It On Tuesday – Thankful
  2. Brown Sugar Challenge – Gratitude, kindness or thankfulness
  3. Use Your Stuff – Thank You
  4. Inkspirational – 
  5. Stinkin’ Inkers – Just because
  6. International Art And Soul –  Autumn Colours
  7. Dare 2 B Artzy – Thanks
  8. Rhedds Creative Spirit – Fall and winter
  9. Everybody Art Challenge – Tag
  10. Altered Eclectics – Anything goes